
How to Maintain Reclaimed Wood Siding
Reclaimed wood siding does not come with a single maintenance formula. Species, board profile, prior processing, exposure, and finish all influence how the material responds to moisture, sunlight, cleaning, and seasonal movement. Weathered color is often part of the wood's history, not proof that the siding is failing.
Request project-specific material guidance before choosing a finish or aggressive cleaning method.To understand how to maintain reclaimed wood siding, begin by identifying the actual species, profile, exposure, and existing finish. Then inspect drainage and flashing, clean gently, and distinguish natural patina from active moisture damage before deciding whether the boards need refinishing or repair.
That measured approach matters because exterior siding faces rain and ultraviolet light, while interior paneling usually faces different sources of dust and humidity. The reclaimed barn board siding guide provides useful background on species, textures, sorting, and installation. From there, the first maintenance decision is whether the existing surface should remain untreated or receive a compatible finish.
Does Reclaimed Wood Siding Need Sealing or Finishing?
There is no universal finish for reclaimed wood siding. The right approach depends on the board's species, grain direction, surface smoothness, exposure, prior processing, and the appearance you want to preserve. Reclaimed boards are not interchangeable: source and product line can affect their condition, profile, weathering, and maintenance needs.
Exterior exposure matters because wood gains and loses moisture seasonally, creating dimensional movement. That movement can stress a paint film and contribute to early finish failure. Species, grain direction, and surface smoothness also affect how well lumber holds a finish. Before choosing a coating, evaluate the actual boards and their installation conditions rather than treating the material as uniform.
How the main finish options differ
- Clear finishes: These can slow the development of gray patina, and some include preservatives that reduce mold and mildew growth. They may suit a project that wants to retain visible grain while moderating weathering, but the result depends on the wood and the specific formulation.
- Penetrating stains: These can be preferable for some woods with wide summerwood bands where paint may not hold well. A penetrating stain changes the color and visual balance of the siding while allowing the underlying texture to remain legible.
- Paint: Paint creates a more opaque appearance, but seasonal movement places stress on the film. It requires careful surface preparation and product compatibility, especially when reclaimed boards have uneven texture or an existing finish.
- Leaving the material untreated: Unfinished exterior wood develops a soft gray patina under ultraviolet light. That weathering can be an intentional design choice, not automatic evidence of failure. It still requires observation for uneven wetting, mold, mildew, or other active deterioration.
Prior processing also matters. Wood Crafting offers reclaimed material in as-is, de-nailed, and power-washed conditions, so the starting surface may differ from one project to another. If an old finish is peeling or flaking, brush, scrape, or sand the unstable material before applying anything new. Do not assume a new coating will correct an unresolved surface problem.
Key takeaway: choose a finish based on the actual species, profile, exposure, surface condition, and desired patina. Confirm product-specific conditions before applying a finish or aggressive cleaning method. For broader material context, review the options for reclaimed siding and paneling.
How Do You Clean Reclaimed Wood Siding Without Damaging Patina?
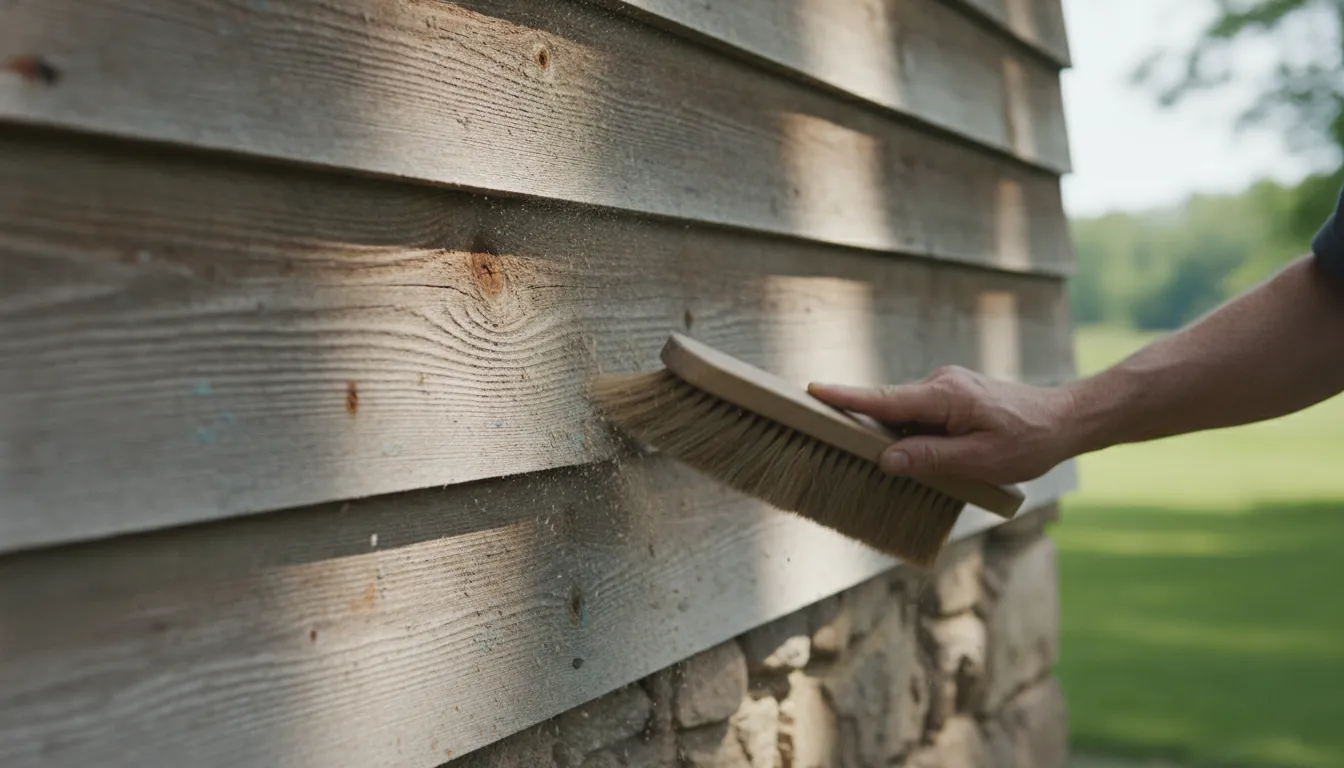
Cleaning reclaimed siding is a preservation exercise, not an attempt to make every board look new. Existing weathering is part of reclaimed wood's character and is not automatically evidence of failure. Because species, profile, exposure, and finish vary from board to board, inspect a small area before treating the full elevation.
Start with the least aggressive method
Begin with dry dust removal. Use a soft brush or another non-abrasive method to lift loose dirt from the face, joints, bevels, and other profile transitions. This first pass matters because profile and installation details can create places where dust and moisture collect. Work from the top downward, and pay particular attention to sheltered areas where debris remains damp longer.
For surface grime, use clean water and a mild soap-and-water wash applied gently. Periodic washing with soap and water can brighten siding finishes, but the goal is controlled cleaning rather than stripping the surface. Test the solution on an inconspicuous board. Use a soft brush or cloth. Avoid aggressive scrubbing that could erase tool marks, soften an aged surface, or create a visibly cleaner patch beside the surrounding patina.
Escalate carefully when mildew is present
Uneven wetting from rain and dew can contribute to blotchy mold and mildew discoloration. If mildew has accumulated, a bleach solution may be appropriate, but do not assume every reclaimed board or finish will respond the same way. Confirm product-specific conditions before using an aggressive cleaning method. Follow the bleach label exactly. Never mix chlorine bleach with other cleaning agents, because some combinations can release poisonous chlorine gas.
After cleaning or bleaching, rinse the surface thoroughly and allow it to dry completely. Do not leave soap or treatment residue in lap joints, rabbets, tongue-and-groove transitions, or other recessed profiles. Inspect those areas again after drying. Persistent dampness may indicate a drainage or installation issue rather than a cleaning problem.
- Do: test first, use a gentle sequence, protect the existing patina, follow product labels, and confirm the board's species, profile, exposure, and finish before changing methods.
- Avoid: unsupported chemicals, abrasive scrubbing, unverified aggressive treatments, and any process that forces moisture into profile joints or leaves the siding wet.
Key takeaway: Clean reclaimed siding gradually, rinse thoroughly, and let it dry before judging the result. When mildew or moisture traps persist, investigate the material and water-management conditions instead of repeatedly intensifying the cleaner.
- Condition: Loose dust or surface grime
- Measured response: Start with a soft brush. Then test a gentle soap-and-water wash.
- Condition: Authentic gray patina
- Measured response: Document it and preserve it unless the project calls for a compatible finish.
- Condition: Persistent mildew or damp joints
- Measured response: Investigate uneven wetting, drainage, and profile-specific moisture traps.
Discuss your reclaimed siding project with Wood Crafting before selecting a maintenance approach.
How Does Exterior Weathering Change Reclaimed Wood Over Time?
Exterior weathering changes reclaimed siding in ways that are often visible long before they indicate a material problem. Ultraviolet light gradually turns unfinished outdoor wood a softer gray, while rain and dew can wet boards unevenly. The result may be a varied surface, with some areas retaining warmer tones and others developing a cooler, silvered patina.
That distinction matters when evaluating how to maintain reclaimed wood siding. A change in color is not automatically deterioration. Wood Crafting describes reclaimed material as showing the characteristics of long use, and existing weathering is part of that character rather than proof of failure. Its sourcing story provides useful context for why variation, tool marks, and age-related color belong in the visual assessment.
UV exposure creates gradual gray patina
Unfinished wood exposed outdoors develops a soft gray patina through ultraviolet exposure. This is a surface change, not a fixed indicator of how long the siding will perform. The pace and appearance depend on the board's species, prior exposure, orientation, surface condition, and any finish applied. A naturally weathered gray board may be an intentional design choice. Wood Crafting's weathered gray corral board is one example of reclaimed material selected for that naturally weathered appearance.
Moisture reveals where inspection is needed
Rain and dew do not wet every portion of a wall equally. Uneven wetting can encourage blotchy mold and mildew discoloration, especially where profiles, joints, overhangs, or installation details retain moisture. A patchy appearance therefore deserves inspection, but it should not be confused with ordinary, even graying. Look for a pattern that corresponds to repeated dampness, poor drainage, or a moisture trap rather than judging color alone.
Seasonal moisture movement adds another layer. Wood gains and loses moisture, producing dimensional change. That movement can stress a paint film and contribute to early finish failure. It is one reason reclaimed boards should be evaluated as individual materials rather than treated as identical. Species, profile, exposure, and finish all influence what a weathering pattern means.
Takeaway: Authentic patina changes appearance; active deterioration changes the material or points to a continuing moisture problem. Before aggressive cleaning or a new finish, confirm the actual board profile, species, exposure, and existing finish, then investigate drainage and recurring wet areas. A product-specific assessment is more reliable than applying a universal maintenance interval or assuming every gray board needs to be restored to its original color.
How Can You Repair Damaged Reclaimed Siding Without Losing Character?
Repair begins with separating normal weathering from active deterioration. Reclaimed wood can show decades of use, nail marks, uneven color, and a softened surface without being unsound. Existing weathering is part of the material's character, not automatic evidence of failure. Inspect the board in context, then preserve sound patina wherever it does not compromise performance.
Start with the type and extent of damage
Loose boards should be evaluated for movement, failed attachment, and the condition of the surrounding profile. A split board may be repairable in place if its remaining material is stable, but a split that allows water into the assembly calls for closer review. Rotten or soft areas are different: deterioration should not be concealed with a cosmetic patch when the board no longer provides a sound surface.
- Loose: Check adjacent boards, joints, and the attachment area before securing or replacing anything.
- Split: Determine whether the split is superficial or extends through a vulnerable edge, joint, or profile.
- Rotten: Remove material that is actively deteriorated, while avoiding unnecessary removal of neighboring boards with sound fibers and stable patina.
- Moisture-affected: Look beyond the visible stain or decay to find where water is entering, collecting, or failing to drain.
Correct the water path before replacing boards
Replacement material will not solve recurring moisture damage if the source remains. Drainage elements should direct water out and over the layer below, and roofs, windows, doors, and wall penetrations should be properly flashed. Check these interfaces before closing the repair. Board profiles and installation details can also create places where dust and moisture collect. Inspect laps, joints, corners, and transitions rather than focusing only on the damaged face.
Match the repair to the existing material
When replacement is necessary, match the profile and species where possible, while accepting that reclaimed boards vary by source, species, weathering, and finish. A close visual match may require sorting for grain, surface character, and color rather than selecting the newest-looking board. Preserve adjacent sound boards instead of replacing an entire elevation for a localized defect. If an old finish is peeling or flaking, brush, scrape, or sand the unstable finish before applying a new one. And confirm that the proposed finish suits the actual wood and exposure.
Key takeaway: Repair the cause, replace only unsound material, and treat stable patina as an asset rather than a defect.
Before choosing a repair or aggressive cleaning method, evaluate the actual board profile, species, exposure, and finish. Product-specific conditions matter, particularly when exterior siding has been mixed, previously coated, or exposed to persistent moisture.
How to Maintain Reclaimed Wood Siding Through Seasonal Inspections
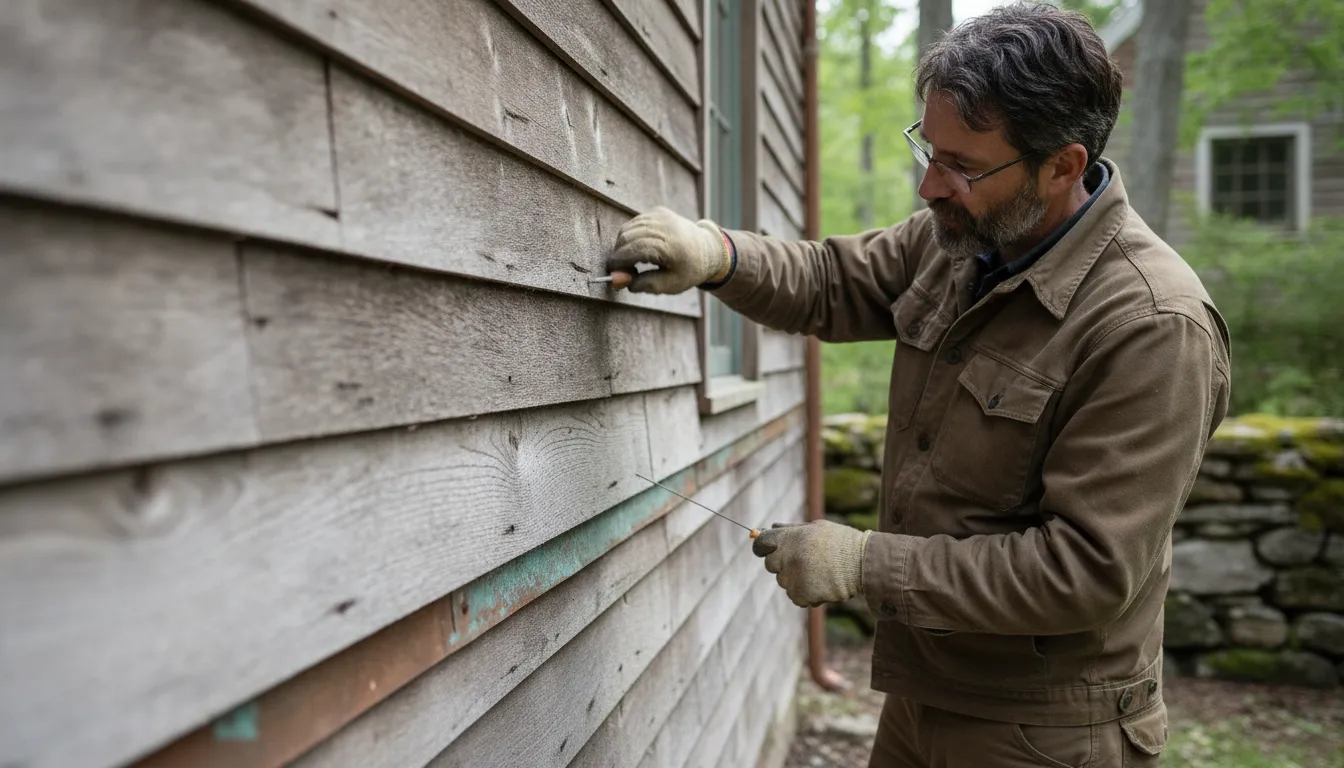
A seasonal inspection is a practical way to separate normal patina from active moisture or fastening problems. Reclaimed boards vary by species, profile, exposure, and finish, so evaluate the installed assembly rather than applying one universal maintenance schedule.
Start with drainage and flashing
Look first at the places where water should leave the wall. Confirm that the drainage plane directs water out and over the layer below it, rather than toward the siding or sheathing. Examine roof edges, window and door openings, wall blocks, and mechanical penetrations for displaced, damaged, or poorly sealed flashing. Water-management details deserve priority because a board that appears weathered may be reacting to a drainage defect. Correctly flashed roofs, windows, doors, and penetrations help keep runoff from entering vulnerable joints.
Check joints, profiles, and moisture traps
Trace horizontal joints, corners, ends, overlaps, and transitions between profiles. Dust and moisture can collect differently in plain, rabbeted, beveled, or tongue-and-groove boards. Pay particular attention to sheltered recesses and areas that remain damp after rain. A darkened section is not automatically a failure, but persistent dampness, softened wood, or recurring discoloration warrants closer investigation. Record where the issue occurs and whether it follows a profile or installation detail.
Evaluate the finish without disturbing sound patina
Inspect for peeling, flaking, chalking, exposed end grain, or areas where the finish has become visibly inconsistent. Existing gray weathering is part of reclaimed wood's character and is not automatically evidence of deterioration. If refinishing is being considered, assess the actual species, surface condition, exposure, and existing coating first. Product-specific confirmation is important before applying a new finish or aggressive preparation method. Any peeling or flaking material should be properly removed before a compatible finish is applied.
Look for mildew and clean cautiously
Inspect shaded elevations, protected joints, and areas affected by uneven wetting for mold or mildew discoloration. Periodic soap-and-water washing may brighten a siding finish, but use a method appropriate to the board and coating. If mildew requires a bleach solution, follow the product label carefully, never mix chlorine bleach with other cleaners, and rinse the surface thoroughly before allowing it to dry. Do not use a forceful cleaning method simply to remove authentic surface character.
Check fasteners, loose boards, and document changes
Walk the elevation for loose, lifted, split, or newly distorted boards. Note fasteners that have backed out, corroded, or no longer hold securely. Compare findings with prior photographs or project records, including the elevation, board profile, visible symptom, weather conditions, and any cleaning or finishing performed. Documentation helps distinguish seasonal movement from a developing repair need and gives a contractor or material specialist enough context to recommend a targeted response.
Request a reclaimed wood quote for project-specific guidance on your siding's profile, exposure, and finish.
What Changes When You Maintain Reclaimed Wood Paneling Indoors?
Interior reclaimed wood paneling is protected from direct rain and ultraviolet exposure, so its maintenance routine is usually less intensive than the routine for exterior siding. The main concerns are accumulated dust, occasional spots or marks, indoor moisture conditions, and preserving the finish and patina that make the material distinctive.
Start with the least aggressive method
Begin by dusting the face of the boards and paying attention to joints, bevels, tongue-and-groove details, and other profile transitions. Board profile and installation details can influence where dust and moisture collect. A flat surface should not be treated exactly like a deeply textured or tightly joined wall. Use a careful, localized approach rather than saturating the paneling.
- Remove loose dust first, working across the grain and into profile details without forcing debris into joints.
- For a spot, use a lightly damp cloth only after considering the board's finish and condition.
- Dry the area promptly and reassess before expanding the cleaning area.
Do not assume that a cleaner, coating, or aggressive scrubbing method is suitable for every reclaimed board. Wood Crafting offers material in different processing conditions, including as-is, de-nailed, and power-washed options. Existing surface character and any finish already on the paneling should guide the next step. Confirm product-specific conditions before using an aggressive cleaning method or applying a new finish.
Account for indoor humidity and material variation
Indoor paneling still responds to its environment. Wood gains and loses moisture, which can produce dimensional movement. Humidity conditions, ventilation, installation details, species, and finish all influence how that movement appears. There is no universal indoor setpoint or maintenance schedule that fits every reclaimed installation. If boards begin to move, open at joints, or show a change beyond their established character. Evaluate the actual profile, species, exposure, and finish before attempting a repair or refinish.
Mixed species and color palettes require the same restraint visually. Mixed Brown Board, for example, combines different species and color palettes and is positioned for decorative paneling. Differences in grain, tone, and existing wear are part of the composition, not defects to erase through uniform cleaning. Review the wall as a whole before treating one board, since a spot repair or new finish can make a naturally varied palette look less cohesive.
Takeaway: Interior paneling needs controlled dusting, cautious spot cleaning, and product-specific finish decisions, not an exterior-siding wash routine. Review available material options for both applications through reclaimed siding and paneling.
Frequently Asked Questions
What maintenance does reclaimed wood siding need?
Inspect the siding for loose boards, splits, moisture entry, blocked drainage, finish failure, and mildew. Clean gently when needed, keep water-management details functioning, and address localized damage before it spreads. The right approach depends on the board's species, profile, exposure, and existing finish, so treat the material as a specific product rather than as interchangeable lumber.
What finish should you use on reclaimed wood?
There is no universal finish for reclaimed wood. Species, grain direction, surface smoothness, exposure, and prior treatment affect how a finish performs. A clear finish may slow graying, while a penetrating stain or paint may suit other boards. Confirm compatibility with the product supplier and follow the finish manufacturer's preparation and application instructions before coating the siding.
How do you clean reclaimed wood siding without damaging its patina?
Start with the least aggressive method: remove loose dirt, then use soap and water with a soft brush or gentle wash. Avoid forcing water into joints and profiles where moisture can collect. If mildew requires a bleach solution, follow its label, never mix chlorine bleach with other cleaners, and rinse the surface thoroughly before allowing it to dry. Confirm the cleaning method for the actual finish first.
Can you leave reclaimed wood siding untreated?
Untreated exterior wood will weather, and ultraviolet light can gradually produce a soft gray patina. That change may be desirable and is not automatically a sign of failure. However, uneven wetting can contribute to blotchy mold or mildew discoloration. Review drainage, exposure, and the board's condition before deciding to preserve, alter, or accept its weathered appearance.
When should damaged reclaimed siding be replaced?
Replace material when inspection shows deterioration that cleaning or fastening cannot correct, especially where moisture is entering or the board no longer performs its intended role. Preserve sound boards with useful patina when possible, and investigate flashing and drainage before installing replacement material. Match the replacement to the existing profile and species as closely as practical, with product-specific guidance when availability or compatibility is uncertain.
Ready to Plan Your Reclaimed Wood Maintenance?
Reclaimed siding and paneling can vary by species, profile, exposure, existing finish, and weathering. Project-specific guidance can help you evaluate the material before choosing a cleaning method, repair approach, or finish. To discuss your application and maintenance questions, request project-specific reclaimed wood guidance from the Wood Crafting team.